Top 7 Wallet Breaking In-app Purchases

Wallet Breaking In-app Purchases

More than 90% of apps and games provide in-app purchase today and some of them are ridiculously high. It is like entering into the fair at free of charge and paying for the rides inside. In-app purchases are effective enough to break your wallet for some extra power ups or levels. Mobile game development experts seems to have nailed it and this is the reason almost all games feature in-app purchase options these days.  While most of the in-app purchase are modest in most of the games, some are jawdroppingly high and outright ridiculous.

1. MY LITTLE PONY – Friendship is Magic

  • Princess Celestia (a character within the game): £20.06

There is a town within the game named Ponyville where ponies are living. One day Nightmare moon spreads his night at Ponyville, covering all ponies in its darkness. Luckily, a pony named Twilight Sparkle escaped the darkness. Now, it’s up to the player and the Twilight Sparkle to repopulate the Ponyville again. This is possible with in-game currency, which you can avail either by doing activities within the game or by giving your real money. The twist is to finish the game you need the most expensive pony named Princess Celestia, which cost you 430 gems or £20.06. It will take over a year to get 430 gems which you can skip by paying such a high cost for it.

2. Real Racing 3

  • Koenigsegg Agera R (a car model): £55.99

No one is unknown of Real Racing series. Real Racing 3 is the one with the beautiful eye-candy visuals and mind-blowing gameplay. Within the series, it was the first game came with the alternatives of different car models. You can select any car to drive, but conditions applied. Some car models will cost you a higher than your budget and the most expensive one is Koenigsegg Agera R with a price: £55.99.

3. Super Monster Bros

  • God Mode (extra energy): $58.99

Super Mario Bros was a terrible game with characters looking like Pokemon and sound effects refresh the memory of Mario. Don’t jump to the iTunes store as the game is not available now. Super Mario Bros was a fine game in every manner, but one thing ruins the whole gaming experience: in-app purchases. Every action within the game leads to the occurrence of pop-up, requesting you to confirm in-app purchases. The costlier one was God mode, which you will get when you fail to achieve the task and you have to pay $58.99 to turn your failure into success.

4. Contract Killer

  • Nanotech Sniper (a rifle): £64.39

A charming game gives you a chance of systematic murder. You have weapons to complete your task and some additional weapons are given there to increase your capacity. If you are not satisfied with the available weapons and wish to upgrade, you have to pay a real money to fulfil your wish. The most expensive rifle named Nanotech Sniper will cost you around £60.

5. Deer Hunter Reloaded

  • Infinite Knives Pack (a gun or a pack of guns): £134.60

Dear Hunter Reloaded had topped the list of being best app of 2012. The game is free, it is addictive, it is adventurous or everything it has to keep you busy. One thing might disturb you within the game is weakness of available free weapons and strength of available costly weapons. The game will grab your attention by letting you know the key advantages of expensive overpowered firearms. Among which Infinite Knives Pack cost you a lot higher than others by Price: £134.60.

6. Gun Bros

  • Apathy Bear (a gun): £394

Gun bros is a perfect combination of multiplayer shooting game with attractive graphics and game play. You can purchase everything inside the game using in-game currency – you can earn by playing the game. But the problem is the game makes it difficult for you to earn the enough currency required to purchase extra guns. And the gun named Apathy Bear with a cost 3499 War bucks (in-game currency) will take your years to earn or take £394 from your wallet to save your time.

7. Curiosity – What’s Inside The Cube

  • Diamond Chisel (a powerful tool to destroy the cubelets): £47,000

To know the secret of cube, you have to destroy the 2000 layers of the box, filled with 64 billion cubelets. The game will give you coins to destroy the cubelets and lets you collect more coins to purchase tools that help you destroy more. The most powerful tool is Diamond Chisel. It costs as per its capacity, but out of your capacity to pay for. It costs £47,000, in exchange of which you will get 3 billion in-game coins to purchase the Diamond Chisel.

And the winner is Curiosity – What’s Inside the Cube for being the top wallet-breaking in-app purchases followed by Gun Bros at second place. You can continue these games without making any in-app purchases, but the stage or level will come which necessitate the availability of in-app items, tools, characters or anything else within the game.

Related: How to create a trail in Unity3D?
How to make your own augmented reality simulation in Unity using Vuforia?

augmented reality simulation in Unity using Vuforia

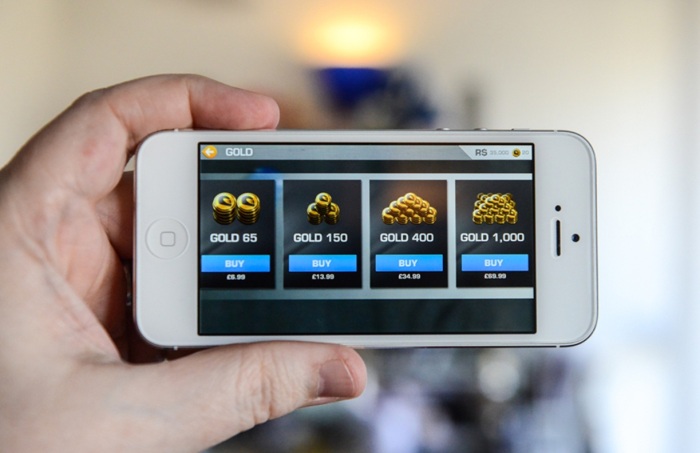
You get a lot of Augmented Reality in games and probably you should also know how to create one. We have a made a simple and a quick free unity 3D scripting tutorial for you to get started in no time. We are going to make this AR effect using Vuforia.

First, you must update the latest vuforia plug-in from their site and create a custom image of the target from https://developer.vuforia.com . Now download target as a unity package and import the plug-in. Create an empty game object and attach “Image Target Behaviour” script.  Set properties of this script Set type to Predefined, Dataset which give you an image name ,Image Target– select name which one when you will create a target.

Now attach  “Image Target Trackable EventHandler” Script.  In “image target trackable eventhandler “script you will change On Tracking Found method and On Tracking Lost method. Add the game object to the empty game object already created and set it on image target. dd AR Camera prefab in hierarchy panel. check load data set and activate.

Augmented reality is being used by a lot of games to create path breaking games. One of them is Ingress. It is surely one of the best strategy games out there and has been developed by Google. Apart from Ingress, Drakerz Confrontation, Pulzar and many more.

Have a great time learning the tutorial. Next time we would take up a Unity 3D game source code for creating infinite 2D map. Cya!

Related: Make your Christmas merrier with these 12 Apps

How to create a trail in Unity3D?

How to create a trail in Unity3D

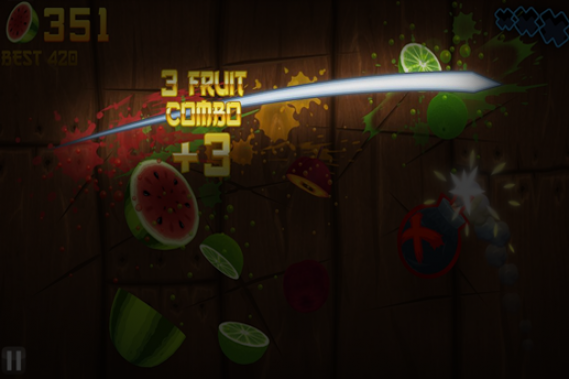
Trails are a common sight in every mobile game these days. Be it a fired bullet or the blade swoosh of Fruit Ninja, they are everywhere. You would definitely need to employ trails in any of your games anytime. So, how do you make this trail? This free unity 3D scripting tutorial can help you out with that.

We will use the trail renderer feature of Unity game engine to create the this effect. Go to the trail renderer component and add this to an empty game object.

There are some major properties within the trail renderer that you would need to specify in order to get the desired effect that you want with your trail.

  • Materials: Use default material or create a new material and set to Mobile/Particles/ Alpha Blend.
  • Time: Length of trail in Seconds.
  • Start width: Width of trail at start.
  • End width: Width of the trail at the end.

Other properties are kept default.

Now, write the code as shown here in the tutorial. You can also download this unity 3D game source code for free and tweak the parameters by yourself. After you have written the code, attach it to the object to which you have assigned Line Renderer.  You’re done!

Please note that Line Renderer has been introduced in Unity since quite some time and many people have been using it. It is available across all the version of Unity.

Have a great time creating your own trail. Next time we would learn to create our own augmented reality simulation in Unity. Cya!!

Related: What are the common types of Game Assets?

How to create snowing effect in Unity3D using shaders ?

snow effect in unity

Shaders come really handy to create a number of effect. We have already gone through free unity tutorial where we created the dust removing effect already. Today, we are going to see how can we employ shaders to create snowing effects in unity.

You can use this method to create make a 3D world covered with snow or may be a vehicle or any object set in a 3d environment. In short, it is a common feature that you might use in future, building a game.

To employ this feature, let us employ a shader and tweak its variables to get the desired effect as the way we want it. Go through some lines of code we’ve written to set a few parameters. You need to set parameters for the shader and subshader.

Now create a material and select the above shader. Go to the material inspector and set variables for the base and bump texture. Here you can change the colour of the snow. If you are creating an effect where water is being poured on the object then you would have to set it to a different colour.

The last variable that remain here is the ‘depth of snow’. You can control the depth of snow by setting the parameter as shown in this unity 3d game source code.

Next time, we would learn to create trails in Unity- very similar to the ones seen in Fruit Ninja. Till then, chill out with the snow and download the free tutorial.

Related: Privacy Concerns on Mobile in 2015

How to create a camera animation using SPLine in Unity?

spline camera animation in unity3d

Games are pure entertainment and with game engines getting advanced, a lot of theatrical effects are getting common everyday. One of them is the camera movement across a game environment. Camera movements are extremely important. They add as an important element to interpret and enjoy the game from a whole new level. But how do be create one? This free Unity3D Scripting tutorial can help.

You can create a camera animation using SPLine in Unity game engine. First download the SPLine package controller and have it by your side.

Go to Unity Game engine and open the controller. You will come across a number of factors to create your camera animation loop for any specified game object you desire. Set the SPLine root to game object and the required duration too. Set ‘orientation mode’, ‘wrap mode’, ‘auto start’, ‘auto close’ and ‘hide on execute’. Add the script to the object after you have set all the parameters.

The next thing to do is to create an SPLine Root –

  • Create a cube or any basic shape from hierarchy panel.
  • Set this cube as SPLine point. Make sure to set rotation of the object during the camera animation if you intend to.
  • Set points(cube or game objects) as per your path.
  • Create a parent object of SPLine points.
  • Assign this parent object in Spline controller script in “Spline Root”.

And that’s it, you have created your own camera animation. Next, time we would give you Unity3D game source code for creating an infinite 2D map in Unity. Till then, run some mocks to create your own camera animation.